Reticulum Network
Source: UT3USW's personal blog
Reticulum is an open networking stack, built on cryptographic algorithms, for building local and global networks on affordable hardware. Reticulum can work even under conditions of high latency and low bandwidth. So we are told by the official site.
So, it is a set of tools for building private networks. What sets Reticulum apart is the number of supported interfaces, including i2p and a range of radio modems. Whereas VPN services such as WireGuard need an existing Internet connection, Reticulum is designed to work over radio at rates from 5 bits/s. Of course, such flexibility has its price — the entry threshold for Reticulum is quite steep, the community is smaller and a lot of aspects are frankly raw and demand skill and understanding from the user. Let us look briefly at the protocols that make all this possible. If you are interested purely in using it, feel free to skip the next section.
Author: UT3UMS
The basics of the Reticulum protocol
Instead of the concept of addresses and ports from the TCP/IP stack, Reticulum uses the
notion of a destination. It is computed as a SHA-256 hash of certain destination
parameters and truncated to 16 bytes (128 bits), for example e28abb8404ff41936bff8ecee0ab3234.
Destinations come in four types:
- Single: packets from one sender to one recipient. Encrypted with ephemeral keys derived from ECDH. Such messages can be read only by the author and the addressee.
- Plain: unencrypted messages intended for several recipients. Since the network's addressing is based on encrypting packets, packets with a plain destination are never transported and are available only to immediate neighbours. Used for broadcasting public information, such as beacons, public telemetry, announcements and so on.
- Group: data sent to this
destinationis encrypted with a symmetric key. It is therefore readable by everyone who holds that key. At the moment suchdestinationsare also not transported, but the developers plan to change this in the future. - Link: creates a virtual channel of the
Singletype across several hops. Essentially a VPN within Reticulum, but it can also work without hops. ALinkconnection gives a broader API, more reliable delivery of large volumes of data, forward secrecy, initiator anonymity and much more.
Besides this, destinations can have a convenient full name; traditionally it is written
in dotted form, like domains on the Internet. These names, however, are not unique;
different nodes with the same name will have a different hash and destination.
The Reticulum network has no central core or single source of truth. To be reachable, nodes periodically send a special announce packet on all available interfaces. This packet contains:
- The destination hash of the announcer
- The public key of the announcer
- Application-specific data — yes, you can add, for example, a status or description field for your node
- A random binary blob that makes each new announce unique
- An Ed25519 signature over the above information, confirming its authenticity
You can read more about the announce mechanism here
The use of asymmetric encryption implies the existence of identities — Identities. Every
destination is bound to an identity, but a single identity can have several destination
addresses. An identity does not necessarily denote a person or an account; it is an
abstraction of an entity that can perform actions, or against which actions can be
performed.
For more stable operation of the system there are two special node types — reticulum instance and transport node. The vast majority of all the nodes on the network belong to
the first category. Transport-type nodes are similar to the floodfill routers of the i2p
network — they help with addressing and, sometimes, with transporting packets across the
network.
Reticulum supports a large number of interfaces:
- TCP: client and server
- UDP: with broadcast capability
- I2P: with a router running, Reticulum will generate a new i2p address for itself and thereafter listen for incoming traffic on that address
- Serial interface: Reticulum will work over UART, which can be useful for specific equipment such as IrDA.
- KISS: Reticulum can work with any radio modems and TNCs that support the KISS protocol.
- AX.25 KISS: the same, but each Reticulum packet is additionally encapsulated in AX.25, useful for a great deal of amateur packet equipment and networks
- PIPE: Reticulum will send all packets to the stdin of a given program and wait for incoming traffic on its stdout
- RNode: a special interface type for working through LoRa devices. The development of devices called RNode is supported by the Reticulum community. There are currently both DIY build instructions and firmware for popular esp32-based boards.
- Auto: the auto-interface, uses UDP, needs a minimally switched network (an Ethernet switch or a Wi-Fi AP is enough) and link-local IPv6. It does not need IP infrastructure such as DHCP.
To seasoned enthusiasts of p2p and overlay networks, Reticulum probably brought to mind two classic initiatives — i2p and gnunet.
Packet structure
| HEADER 2 bytes | ADDRESSES 16/32 bytes | CONTEXT 1 byte | DATA 0-465 bytes |
-
[HEADER 2 bytes]
- Byte 1: [IFAC flag], [Header type], [Transport type], [Destination type], [Packet type]
- Byte 2: Number of hops
-
[ADDRESSES 16/32 bytes]
- Each address: 16 bytes
- The HEADER field determines whether the ADDRESSES field contains 1 or 2 addresses
- Addresses are SHA-256 hashes truncated to 16 bytes
-
[CONTEXT 1 byte]
- Used by Reticulum to determine the context of the packet
-
[DATA 0-465 bytes]
- Contains the packet payload
For more detail see the official documentation
RNS — Reticulum Network Stack
At the moment, the main implementation of Reticulum is written in Python. You can install it
through pip or pipx; the latter will itself create a virtual environment for each
installation and will not break the system's Python dependencies — pip install rns or
pipx install rns. Of course you can install it yourself — Releases · markqvist/Reticulum.
The set of utilities is somewhat similar to what we are used to using in TCP/IP up to Layer 3.
rnsd: The main service daemon of the stack. It has a usefulrnsd --exampleconfigflag for bootstrapping the configuration files.rnstatus: Statistics on the interfaces, an analogue ofip afrom the TCP/IP world. It takes an interface name filter as an optional parameter:rnstatus -A RNodernid: Identity management and the related cryptographic functionality: computing destination hashes, encrypting/decrypting files and messages.rnpath: Checking the route to a given destination, an analogue oftraceroute. Example:rnpath 81c987e99b3cf649c3957942355085barnprobe: An analogue of thepingutility, with the difference that destinations do not respond to a probe; this is configured by therespond_to_probesparameter in the main config. When available, the probe also displays SNR and RSSI.rncp: As the name makes clear, this is a utility for transferring files between nodes. To work,rncpon the receiving side must be started with the--listenflag.rnx: Remote command execution, with the option to connect in a pseudo-shell mode.rnodeconf: A utility for flashing and configuring RNode LoRa terminals.rnodeconf --autoinstallwill start the configurator and flash the connected board in wizard mode.
How do you use this?
In general, Reticulum is designed for building separate private networks. Still, so that you
can try it out and get a feel for it, enthusiasts maintain a so-called test net — the public
RNS network. To join it, you need to create the appropriate interfaces
in the .reticulum/config file:
[interfaces]
...
# TCP/IP interface to the RNS Amsterdam Hub
[[RNS Testnet Amsterdam]]
  type = TCPClientInterface
  enabled = yes
  target_host = amsterdam.connect.reticulum.network
  target_port = 4965

# TCP/IP interface to the BetweenTheBorders Hub (community-provided)
[[RNS Testnet BetweenTheBorders]]
  type = TCPClientInterface
  enabled = yes
  target_host = betweentheborders.com
  target_port = 4242

# Interface to Testnet I2P Hub
[[RNS Testnet I2P Hub]]
  type = I2PInterface
  enabled = yes
  peers = g3br23bvx3lq5uddcsjii74xgmn6y5q325ovrkq2zw2wbzbqgbuq.b32.i2p
You can read more here about configuring the other interfaces.
Run rnsd in the console and you will see
[2024-08-03 00:00:04] [Debug] Started shared instance interface: Shared Instance[37428]
[2024-08-03 00:00:04] [Verbose] Bringing up system interfaces...
[2024-08-03 00:00:05] [Debug] Establishing TCP connection for TCPInterface[RNS Testnet Dublin/dublin.connect.reticulum.network:4965]...
[2024-08-03 00:00:05] [Info] Bringing up I2P tunnel to I2PInterfacePeer[RNS Testnet I2P Hub A to g3br23bvx3lq5uddcsjii74xgmn6y5q325ovrkq2zw2wbzbqgbuq.b32.i2p], this may take a while...
[2024-08-03 00:00:10] [Error] Initial connection for TCPInterface[RNS Testnet Dublin/dublin.connect.reticulum.network:4965] could not be established: timed out
[2024-08-03 00:00:10] [Error] Leaving unconnected and retrying connection in 5 seconds.
[2024-08-03 00:00:10] [Debug] Establishing TCP connection for TCPInterface[RNS Testnet BetweenTheBorders/betweentheborders.com:4242]...
[2024-08-03 00:00:10] [Debug] TCP connection for TCPInterface[RNS Testnet BetweenTheBorders/betweentheborders.com:4242] established
...
rnsd as a system service
To make it all solid, the network-stack service should run as a daemon, in the background. Let us create a systemd unit /etc/systemd/system/rnsd.service, so that rns becomes an ordinary system service
# /etc/systemd/system/rnsd.service
[Unit]
Description=Reticulum Network Stack Daemon
After=multi-user.target

[Service]
# If you run Reticulum on WiFi devices,
# or other devices that need some extra
# time to initialise, you might want to
# add a short delay before Reticulum is
# started by systemd:
# ExecStartPre=/bin/sleep 10
Type=simple
Restart=always
RestartSec=3
User=%username%
ExecStart=rnsd --service

[Install]
WantedBy=multi-user.target
If you installed rns through pipx, you need to make sure the rnsd executable is available on the system $PATH. The simplest thing is to create a symlink, for example in /usr/local/bin/:
# Check that there is no program with this name
ls -l /usr/local/bin/rnsd
# The output should be empty

# Confirm where pipx puts the files:
pipx list | grep -i '$PATH'
# The output should be roughly
# apps are exposed on your $PATH at /home/%username%/.local/bin
# if the directory differs, use your value in the next command

# Create a symlink in /usr/local/bin pointing to the pipx-installed version
sudo ln -s /home/%username%/.local/bin/rnsd /usr/local/bin/rnsd

# Load our new unit into systemd
sudo systemctl --user daemon-reload
sudo systemctl enable rnsd.service
sudo systemctl start rnsd.service
sudo systemctl status rnsd.service
# There should be no errors

rnstatus
# Will show statistics on the interfaces
The RNode interface
The possibility of your own encrypted, interference-resistant and yet cheap physical layer is what interests people in Reticulum almost first of all. All you need is an esp32 microprocessor and one of the LoRa chips on the SPI interface. Popular dev boards are supported, such as: LilyGO LoRa32 v2 Heltec LoRa32 v2 full list. I have flashed the LilyGO LoRa32 and the LilyGO T-BEAM more than once.
It is important to understand the difference from Meshtastic — an RNode is purely a radio interface. Without a computer or phone actively connected to the RNode, the network does not work. It is like a 3G modem plugged into a USB charger.
To create an RNode from a dev board, connect it in flashing mode and run rnodeconf --autoinstall. The text helper will ask for the model of your board and LoRa module, choose the firmware file and load it onto the device.
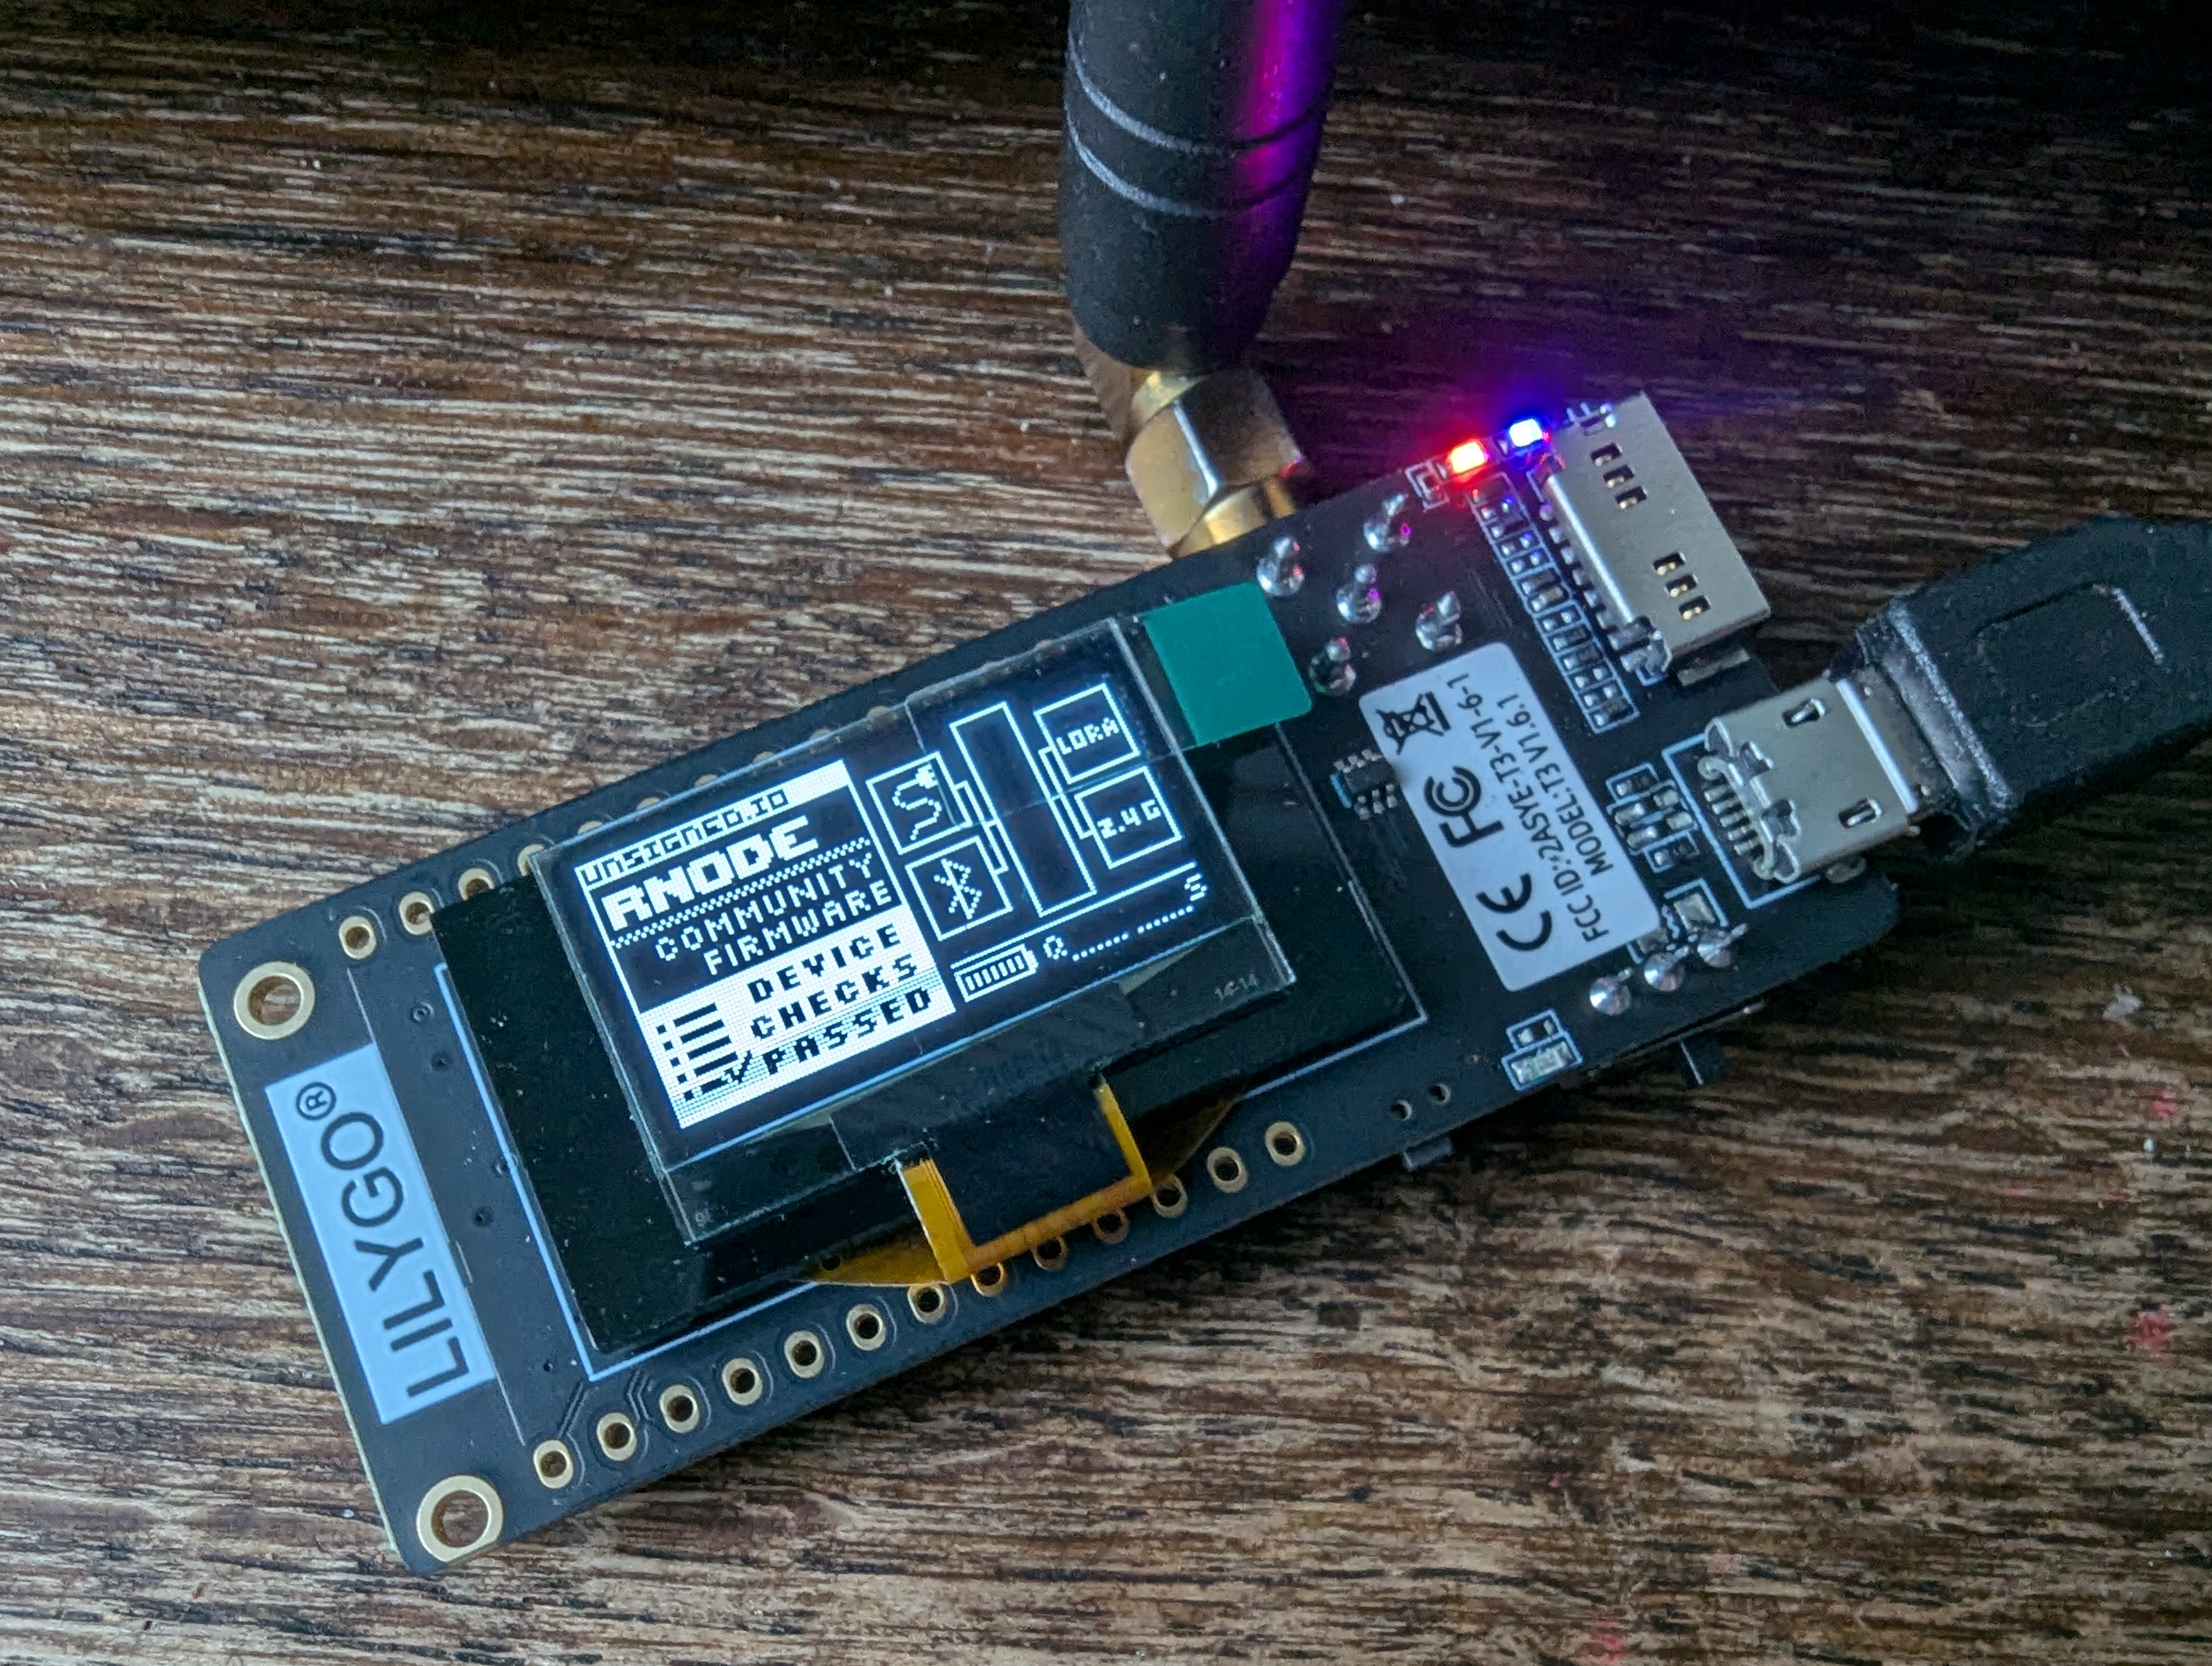
Now you need to configure the interface, setting all the physical-layer parameters for the RNode.
You are about to use a home-made digital radio transmitter; please take note of local law. Remember, breaching the radio frequency use plan can carry not only legal consequences. Unintentionally causing interference on the air can affect equipment on which people's lives depend. You must be aware of what you are doing and you bear full responsibility for your actions.
[interfaces]
...
  [[RNode LoRa32-RNode]]
    type = RNodeInterface
    interface_enabled = True
    port = /dev/ttyACM0
    frequency = 653000000 # frequency in hertz, 635MHz
    bandwidth = 125000    # channel width in hertz, 125 KHz
    txpower = 7           # transmitter power in dBm (5 mW)
    spreadingfactor = 8   # number of chirps per symbol, value 7-12
    codingrate = 5        # size of the packet's overhead bits, value 5-8
  ...
You can check the interface status with rnstatus LoRa32-RNode; you should see something like this:
RNodeInterface[RNode LoRa32-RNode]
    Status    : Up
    Mode      : Full
    Rate      : 3.12 kbps
    Airtime   : 1.3% (15s), 0.01% (1h)
    Ch.Load   : 1.3% (15s), 0.01% (1h)
    Traffic   : 102 B↑
                0 B↓
Information about the RNode is available in rnodeconf -i /dev/ttyACM0.
[00:43:25] Device info:
[00:43:25]      Product            : LilyGO LoRa32 v2.1 420 - 520 MHz (%MAC%)
[00:43:25]      Device signature   : Unverified
[00:43:25]      Firmware version   : 1.72
[00:43:25]      Hardware revision  : 1
[00:43:25]      Serial number      : 00:00:00:01
[00:43:25]      Modem chip         : SX1278
[00:43:25]      Frequency range    : 420.0 MHz - 520.0 MHz
[00:43:25]      Max TX power       : 17 dBm
[00:43:25]      Manufactured       : 2023-12-14 20:22:23
[00:43:25]      Device mode        : Normal (host-controlled)
If Bluetooth is disabled, the RNode will bring up a Wi-Fi access point with a small HTTP
server. It serves the documentation and distributions of RNS, LXMF and Nomadnetwork. The
RNode firmware, rnodeconf and 3D-printable case models are also available on the server — all
of it at the address <http://10.0.0.1/>. That is, the RNode carries on itself everything
needed to deploy the network further and create new RNodes.
LXMF
Reticulum is a network stack, not a network. It solves the tasks of transport, addressing
and the accompanying cryptography. Of course, it has a number of significant limitations,
for example on the packet length. So that we do not get bored, the author of Reticulum —
Mark Qvist — immediately created a higher-level protocol, LXMF. In the official documentation
it is described as a messaging and delivery protocol, which fully matches the network's
minimalist, efficient spirit. The protocol is designed to implement message-delivery
services by default. SMS/email/IM/FIDO-like services are implemented on LXMF with zero
overhead. That is exactly why LXMF "packets" are conventionally called messages — message.
Client-server terminology is not always apt in the LXMF world; the best analogies are USENET
or an MTA.
lxmf-router is a separate utility, likewise available through pip and pipx — pip install lxmf
or pipx install lxmf — and as source. Most
likely this package will be among the dependencies of the higher-level Reticulum software you
will use.
LXMF message structure
Each message is identified by a message-id — a SHA-256 hash of the Destination=,
Source= and Payload fields. Since this hash can be determined at any moment, LXMF messages
do not contain it as a separate field.
Destination: a 16-byte Reticulum destination hashSource: a 16-byte Reticulum destination hashEd25519 Signature: a 64-byte hash ofDestination=,Source=,Payloadandmessage-idPayload: serialised into the MessagePack format and containing the following fields:Timestamp: a double-precision float, theUNIX epochtimeContent: the body of the message.Title: the title of the messageFields: a dictionary of arbitrary depth and structure
The Content, Title and Fields fields are mandatory, but may be empty.
Individual LXMF nodes can work in Propagation mode. In that case they will accumulate
messages for members who are offline, implementing a store-and-forward mechanism. When a
message is stored for users outside the network, the real message-id cannot be computed
from the Payload, because the Payload is encrypted for the final destination. In such
cases the message is assigned a temporary transient-id.
Since an LXMF message is by its structure a hash, it can be printed out as a QR code or a URL
with a prefix such as lxm://. The minimalist spirit of delivering messages by any means
resonates with another project — nncp — but nncp does not function
on a global scale.
LXMF feels like the analogue of HTTP in the Reticulum world. There is already a certain amount of software running on LXMF and even interoperating with one another.
Nomadnet
Software by the same Mark Qvist. Nomadnet can be described as a flexible hybrid of a BBS and
a p2p gopher network. For now there is only a TUI client, written in Python. pip install nomadnet
or pipx install nomadnet and the releases.
When installing through pipx you will also need to install lxmf and rns.
To start it in client mode, it is enough simply to run nomadnet, and before you opens an
impressive, to my mind, text menu in the spirit of FAR, minicom, tmux and other TUI
classics.
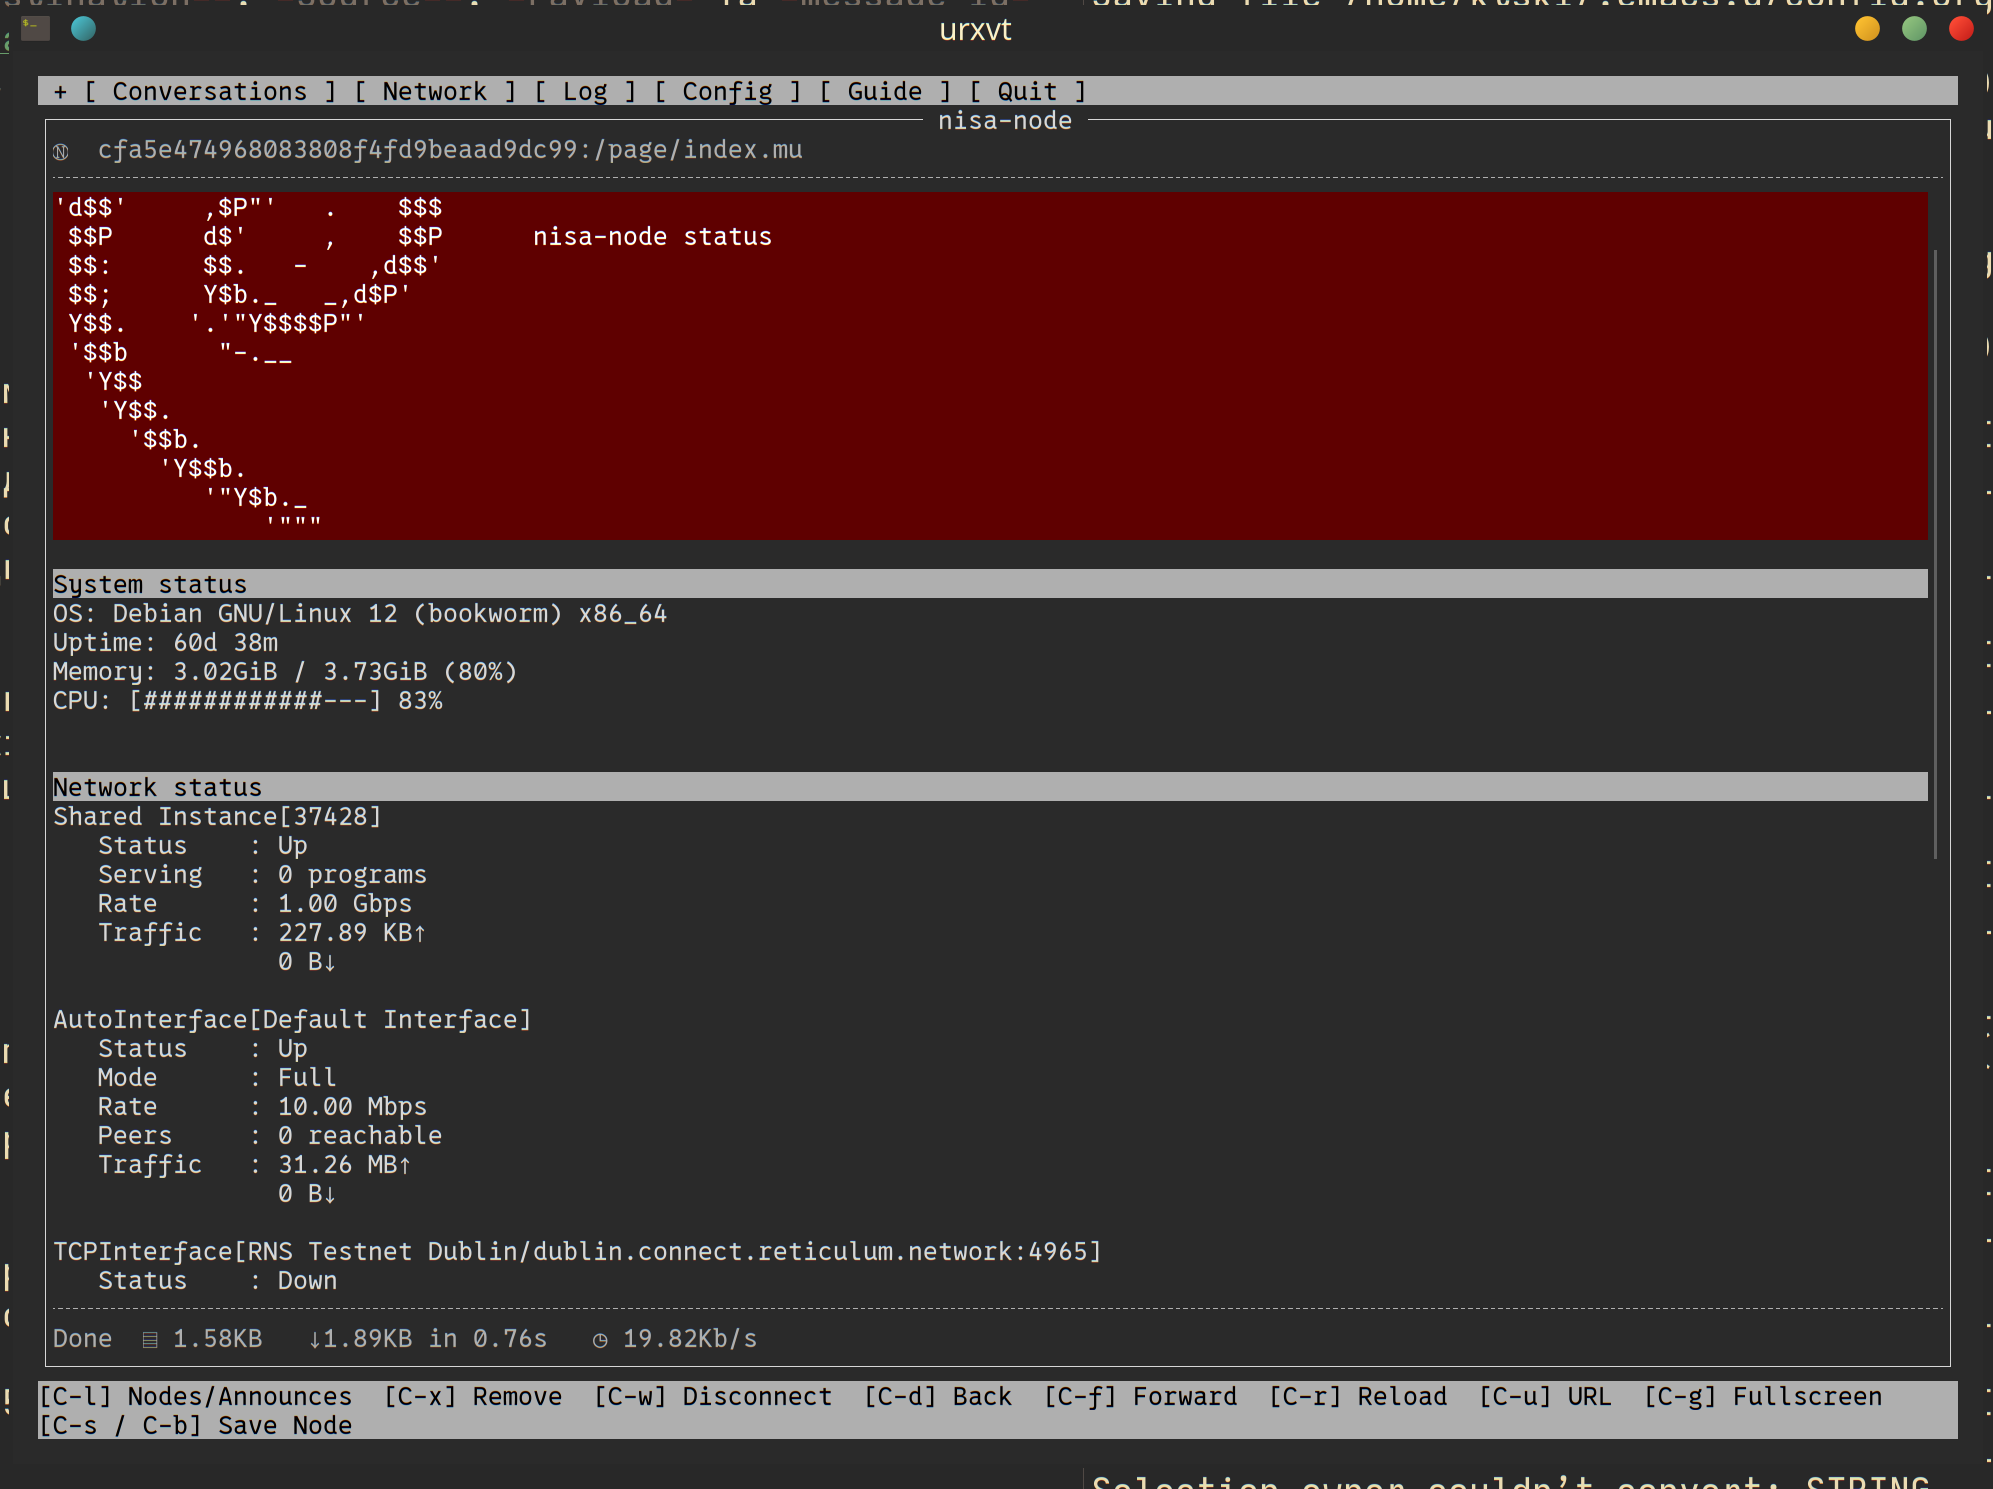
The [ Conversations ] tab is a messenger running on pure LXMF; this makes nomadnet
compatible with other programs at least in the context of correspondence between users.
The [ Network ] tab is a browser for nomadnet nodes — it feels like an analogue of a BBS
and ZX-net. Pages are laid out in the Micron markup language, a full description of which,
with examples, is available in the [ Guide ] tab.
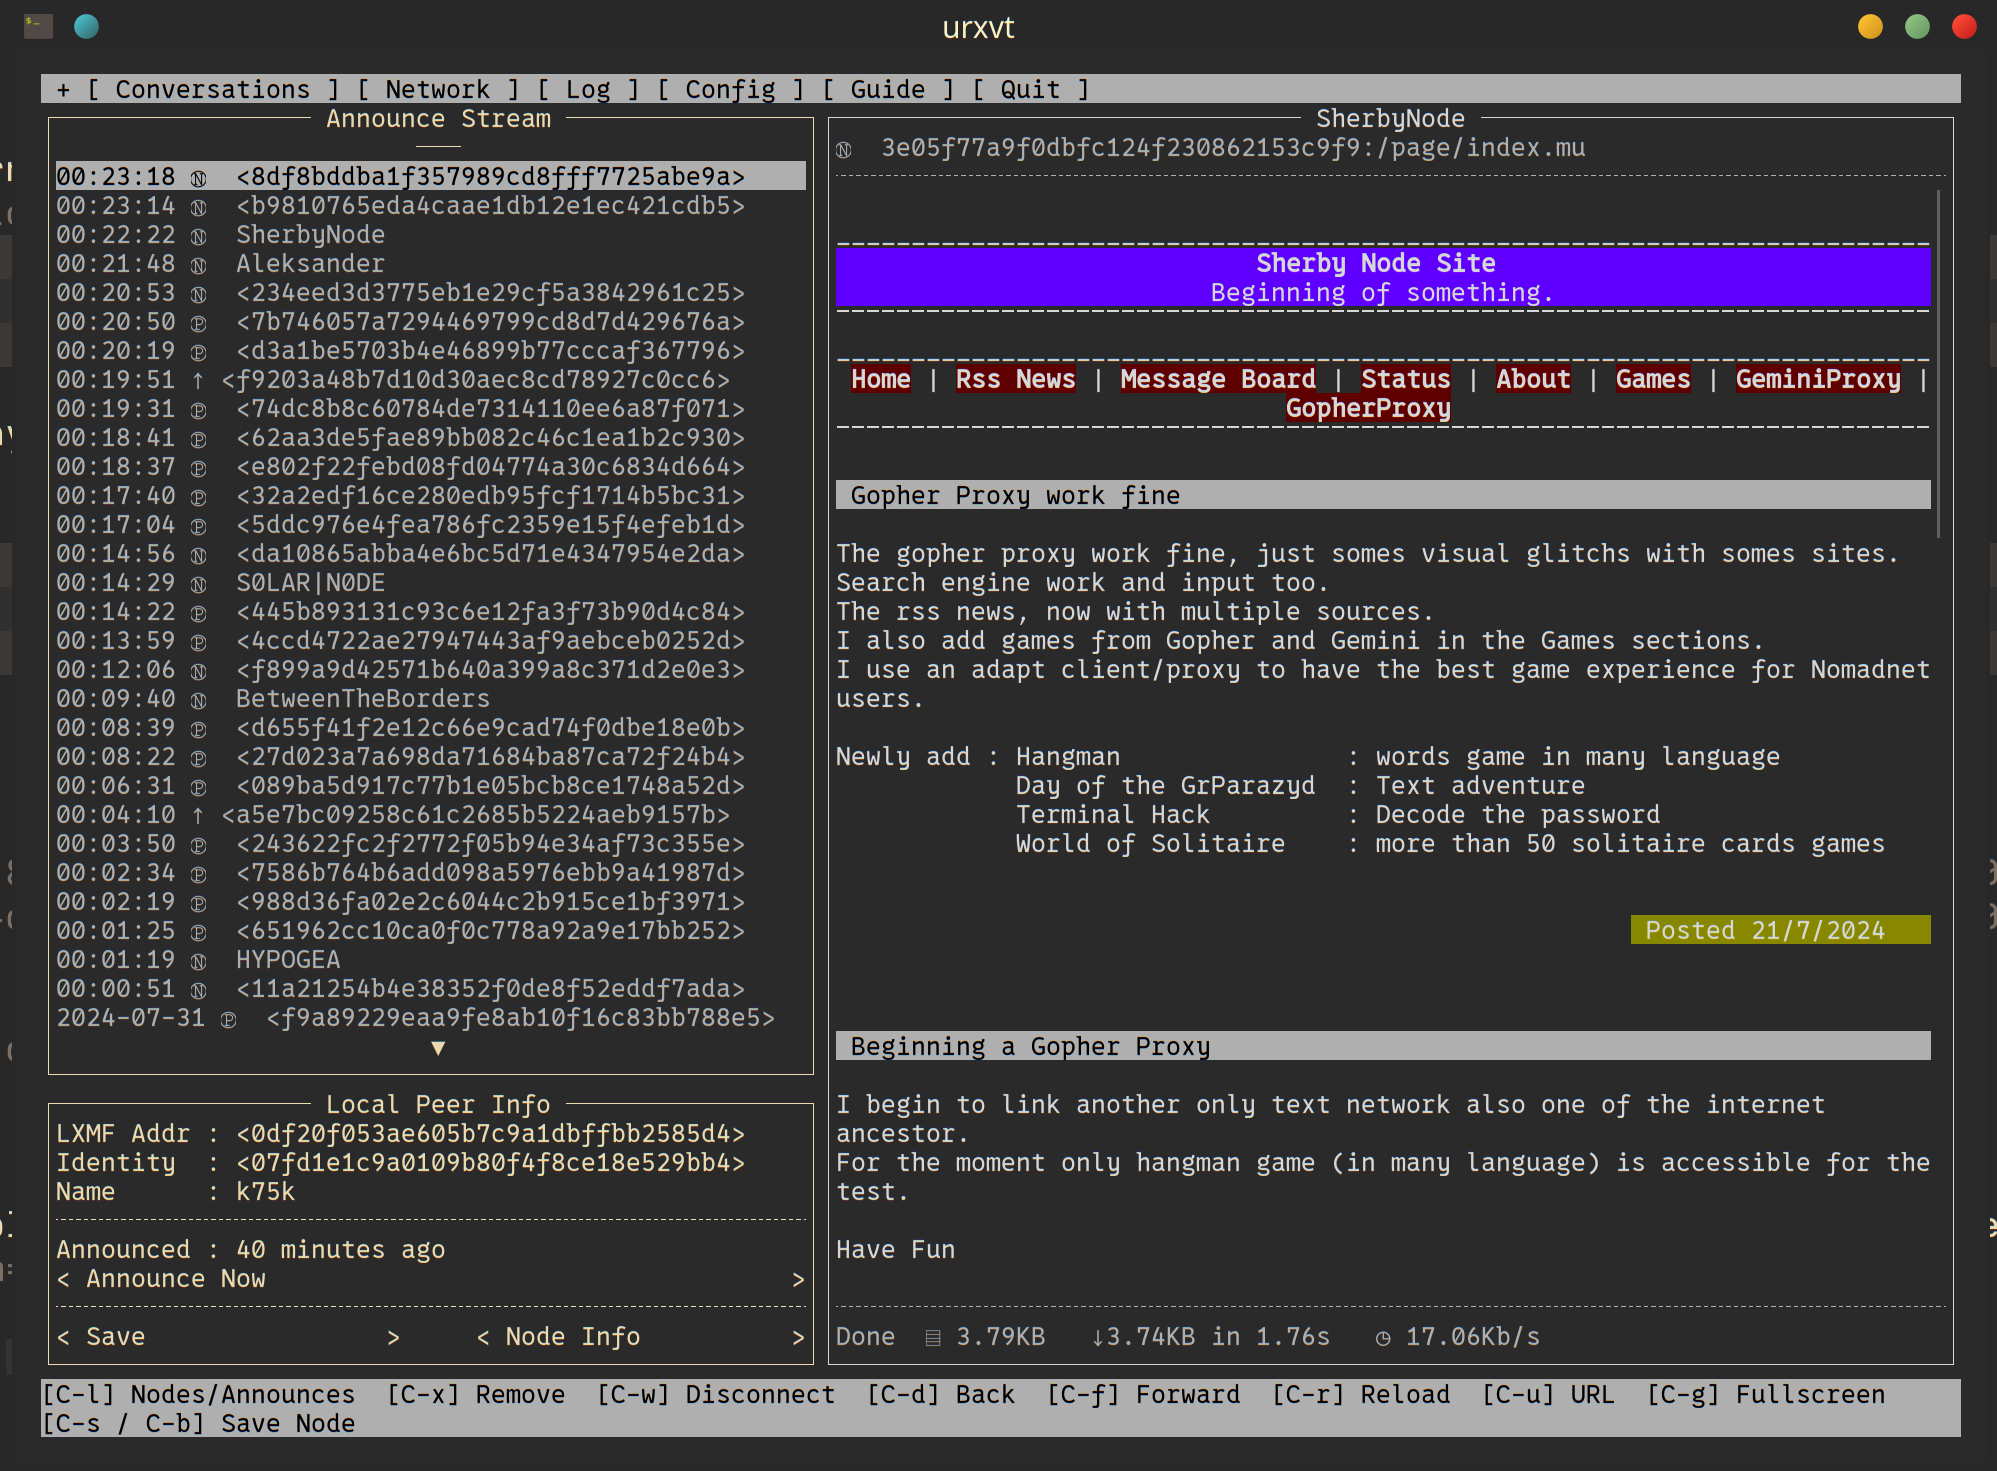
The Ctrl+G key combination hides or shows the side panel. It displays the announces
received from nodes. An ordinary node is marked with the "Ⓟ" symbol, a node in propagation
mode with the "↑" symbol. You can save a node into a kind of "favourites" — then its name
will be shown instead of the hash, for example "S0LAR|N0DE".
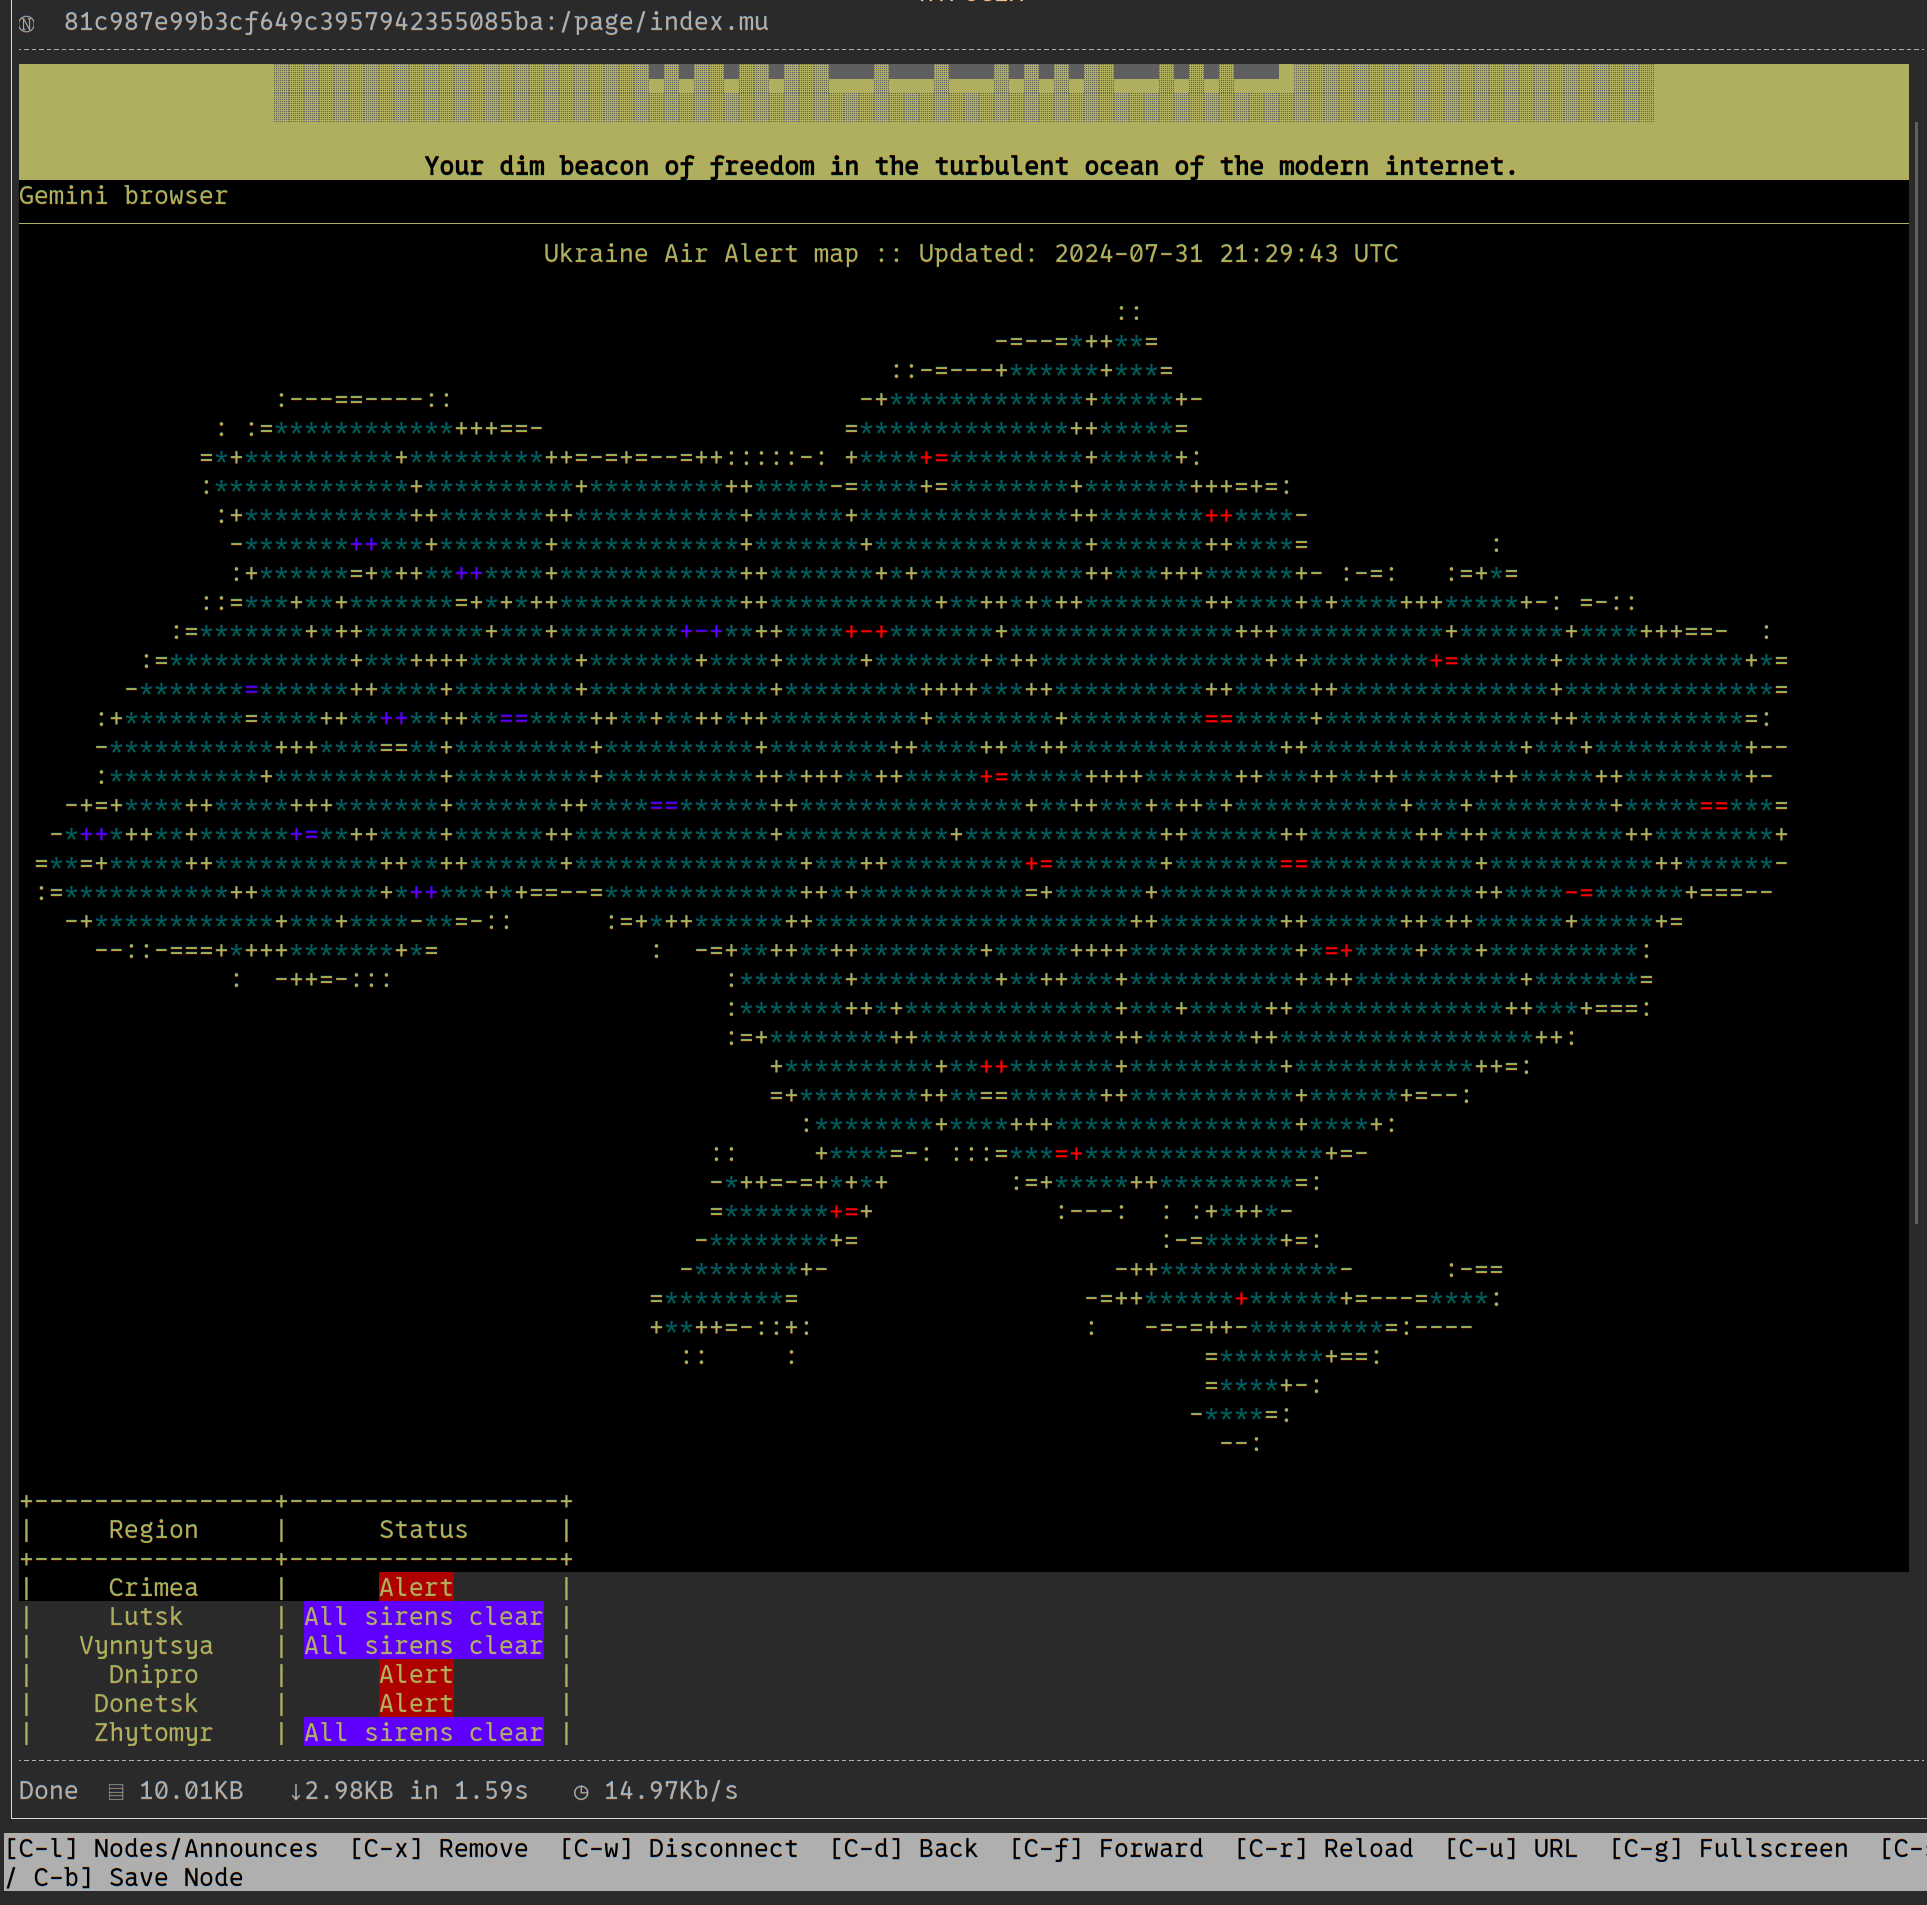
nomadnet://81c987e99b3cf649c3957942355085ba:/page/index.mu
Hosting your own page
To create your own page on the nomadnet network and make it available, you will need to:
Configure the node
nomadnet is p2p software, but by default it works in client mode. To become a "hoster" you need to activate node mode
[node]
enable_node = yes
node_name = HYPOGEA
announce_interval = 360
announce_at_start = Yes
# pages_path = ~/.nomadnetwork/storage/pages
Start the nomadnet service
To work in the background, as web servers do, nomadnet must be started as a daemon. I use the following systemd.unit to start the node automatically:
[Unit]
Description=Nomadnet Daemon
After=multi-user.target

[Service]
Type=simple
Restart=always
RestartSec=3
User=%username%
ExecStart=nomadnet -d

[Install]
WantedBy=multi-user.target
Create a page
A page can be either a pure Micron file or a Python script that returns such a file. The file extension is .mu.
#!/usr/bin/env python3

import os
import time
import subprocess

# Browser pages cache time in seconds.
CACHE_TIME = 0 #0=No cache, None=Default
# Date/time format for formatting on the screen.
DATE_TIME_FORMAT = "%Y-%m-%d %H:%M:%S"

# Screen template - Main
TEMPLATE_MAIN = """
`B200`FECF`c
╺┓ ┏━┓┏━┓┏━┓   ╻ ╻╻ ╻╻ ╻┏━┓┏━┓   ┏━╸┏━┓┏━┓╻ ╻
    ┃ ╺━┫╺━┫  ┃   ┣━┫┗━┫┏╋┛┃┃┃┣┳┛   ┃  ┣┳┛╺━┫┃╻┃
╺┻╸┗━┛┗━┛  ╹   ╹ ╹  ╹╹ ╹┗━┛╹┗╸   ┗━╸╹┗╸┗━┛┗┻┛

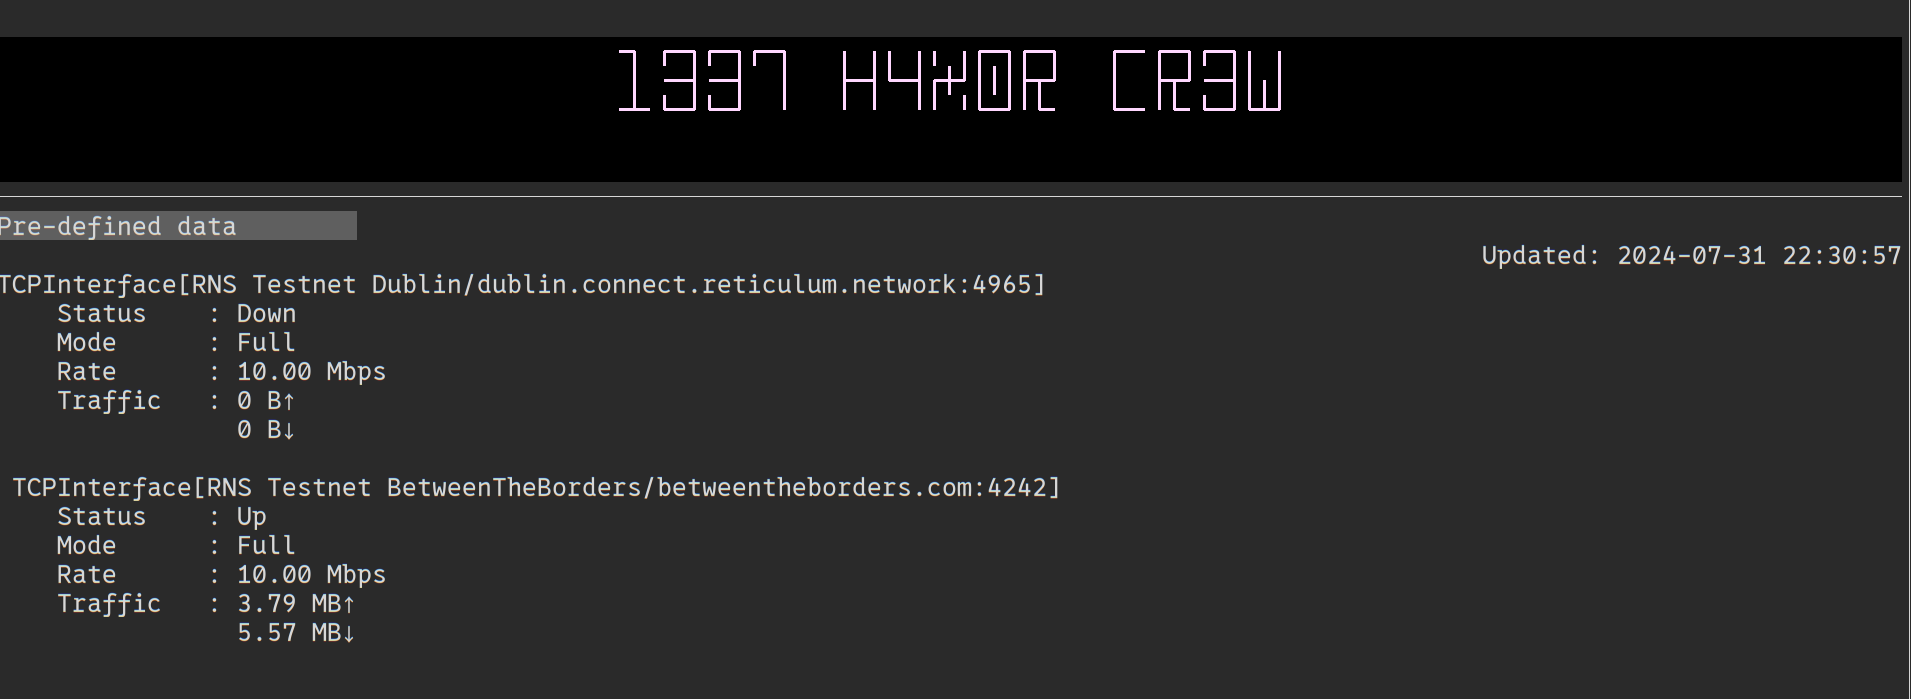
`!`F222Cyberpunx or syberskunx?.
``
-
`B444`<user_input`Pre-defined data>`b
`rUpdated: {date_time}
{entrys}

"""

# Setting the cache TTL for the page through Micron directives
if CACHE_TIME != None:
    print("#!c="+str(CACHE_TIME))

tpl = TEMPLATE_MAIN
tpl = tpl.replace("{date_time}", time.strftime(DATE_TIME_FORMAT, time.localtime(time.time())))
tpl = tpl.replace("{entrys}", subprocess.getoutput("rnstatus testnet").strip())
print(tpl)
The markup starts with the ` character, followed by, for example, B — background — and three hexadecimal digits. Micron uses a three-character hexadecimal colour palette. So you do not have to count by hand, here are all 4096 possible colours in tables. `r=/ =`l=/ =`c — align the element to the right/left/centre. See the [ Guide ] and the examples that ship with the code for more detail.
Sideband
A mobile app, close to Meshtastic in functionality. The UX of the settings can sometimes
be non-obvious. For example:
- to configure an RNode, you have to create a pairing through the system Bluetooth manager, add the Bluetooth name of the RNode device in the appropriate place in the Sideband settings and restart the app
- all the buttons related to importing expect the data on the clipboard.
The app is constantly evolving.
Links
- Getting Started Fast - Reticulum Network Stack 0.7.6 beta documentation: excellent from-zero-to-hero documentation if you already understand the basics of the network
- SebastianObi/LXMF-Tools: Various small programs and tools which use the message protocol LXMF
Source: UT3USW's personal blog